
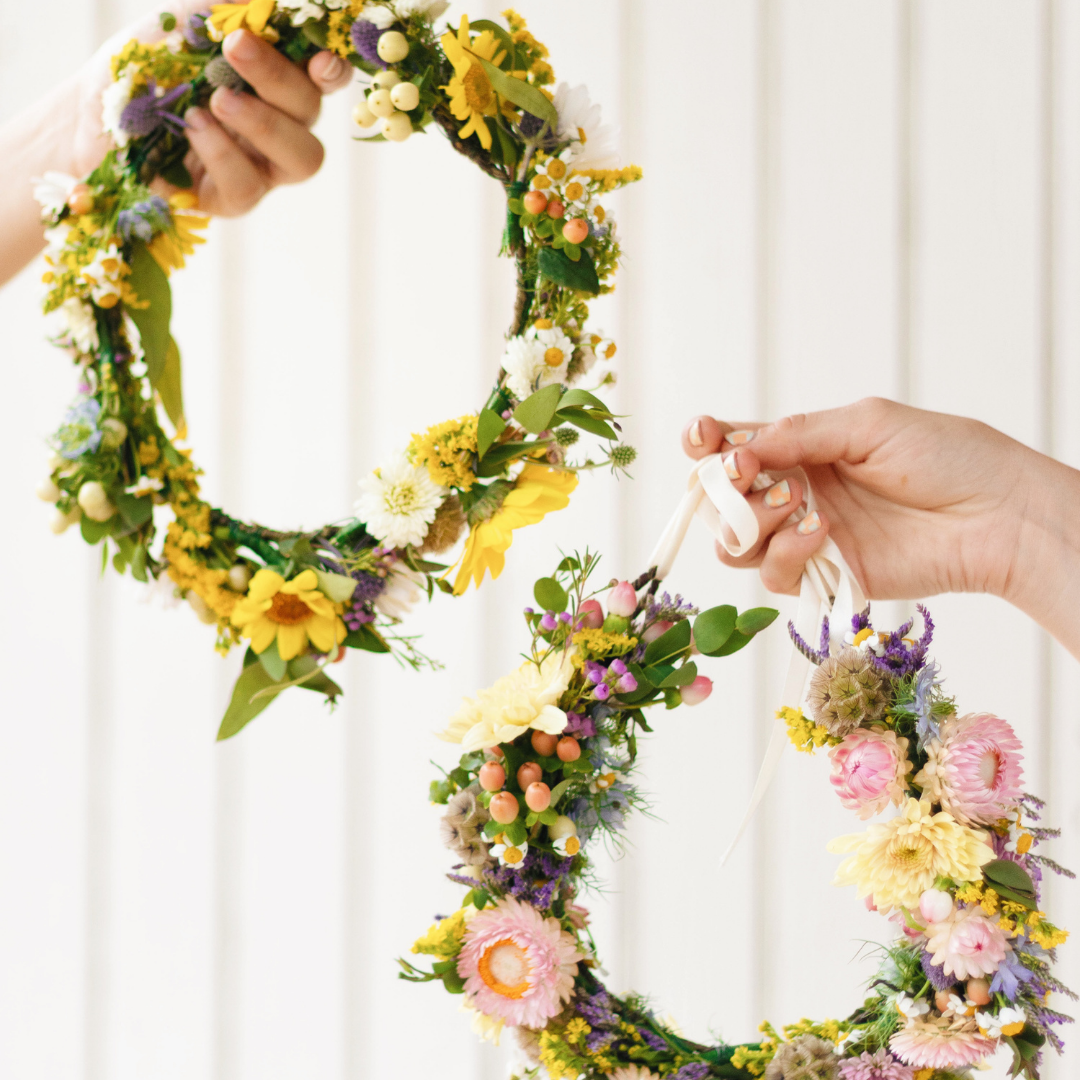
DIY Flower Crowns with The Flower Peddler

If you've stopped by Slow North on weekends, you may have met Kenzie Nixon, better known as The Flower Peddler, selling gorgeous flowers from the back of her newly-renovated 1973 mail truck.
Kenzie's idea for a mobile flower truck came to her when she received a bike as a gift from her now husband, and began peddling around her neighborhood selling flowers from her bike basket. Since then, her business has grown into a fully mobile bouquet bar that you can spot on weekends at your favorite local spots around Austin! (Where + When you can find the truck.)
Last week we got the chance to learn more about The Flower Peddler, her entrepreneurial spirit, and learned how to make DIY flower crowns in celebration of spring.
If you relish in the ritual of seasonal celebrations, connecting to Mother Nature, and creating your own traditions, this DIY is just for you!

Instructions:
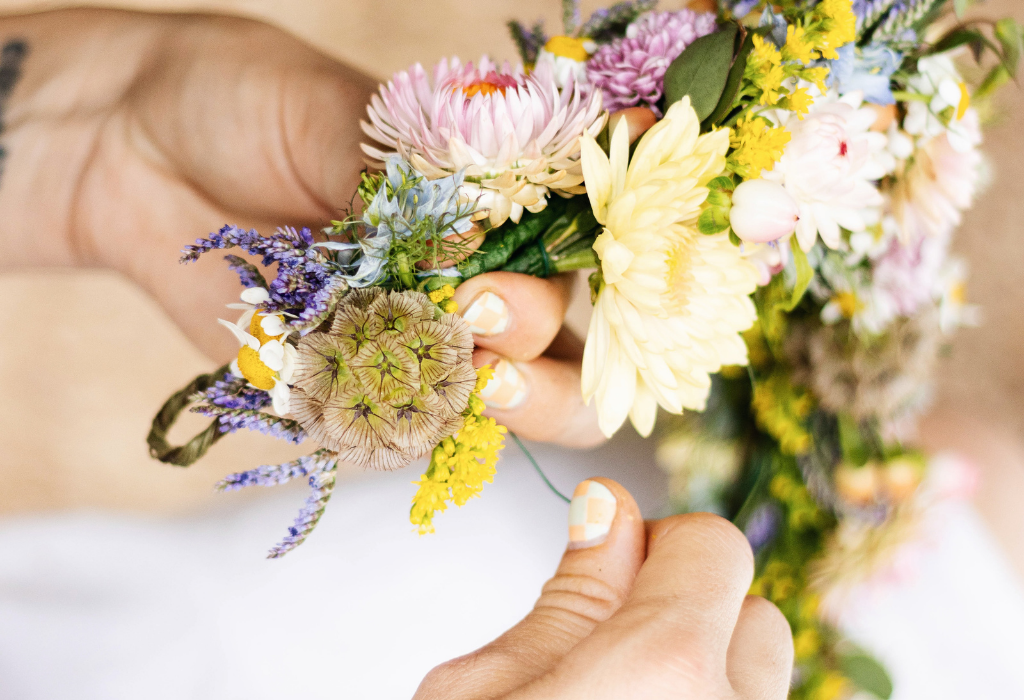
1. Pick your flowers
Where to find your flowers: Head to your favorite local flower shop near you or your favorite grocery store! Make sure to grab a few flowers, some filler flowers, and greenery. This will help you build up your crown.
What kind of flowers: Pick ones that stand out to you most or create a crown packed with meaning by looking up what each flower means before buying. This could be a creative way for you to set your intentions for the coming season of growth!

2. Trim your flowers
Once you have your flowers picked out, grab a pair of floral shears (or hefty scissors) and start clipping your flowers off of the main stems. You'll need to make each clippings stem at least 1.5-2 inches for the bloom. (This will help when you start building your individual flower bundles for your crown.)


3. Prep your mini bundles with floral tape
With each bundle, you will want to have at least 1 main statement flower + 1 to 2 filler flowers + 1 option of greenery. This part of the process can be as intuitive or systematic as you'd like. Once you've gathered your first bundle, start wrapping it from the top down to the base, always tugging the tape to insure it sticks to itself as you wrap down.


**You will need about 15-18 mini bundles to complete your crown
4. Prep your crown base
Grab your rustic wire and measure the circumference of your head, leaving about 3 inches extra length at one end.
Once you've measured this, loop the ends of your crown and twist around the base with enough space for your ribbon thread through.

5. Add your flower bundles onto your crown
Grab your crown base, green floral wire, and mini flower bundles.
Wrap your green wire around the crown base, starting at one of the loops and wrapping away from it. Once you have the green wire secure to the base, place your first bundle on the crown, facing the flowers towards the loop. Wrap the thin green wire around the top of the bundle + crown base finishing at the bottom of the flower bundle.
Once you've wrapped the first bundle securely to the base, grab your second one and continue this pattern until you have room for one bundle.


6. Finish off your crown
Add your the last mini bundle to your crown facing it in the opposite direction of all the other bundles you've place on. This will help your crown look seamless. Wrap it into place and add any extra flowers you need to fill in any open spots.
7. Add your ribbon
For the finishing touch, wrap your ribbon twice around your head and cut it. Then feed your ribbon through both loops and place it on your head to fit and tie it off with a bow.


You're done!
(This DIY is perfect for trying alone in a picnic setting, with a few friends in your backyard or neighborhood park, or whatever inventive ways you imagine!)


